

Home
Cares & Tips for Shades, Blinds, Curtains
How to Remove Shangri-La Shades: A Step-by-Step Guide

How to Remove Shangri-La Shades: A Step-by-Step Guide
Removing Shangri-La shades might seem tricky at first, but it's actually a simple process once you know the steps. Whether you're moving, redecorating, or need to deep clean your shades, we'll walk you through everything you need to know. We've worked with all types of window treatments, and these sheer shades are easier to handle than you might think.
Your Shangri-La Shades
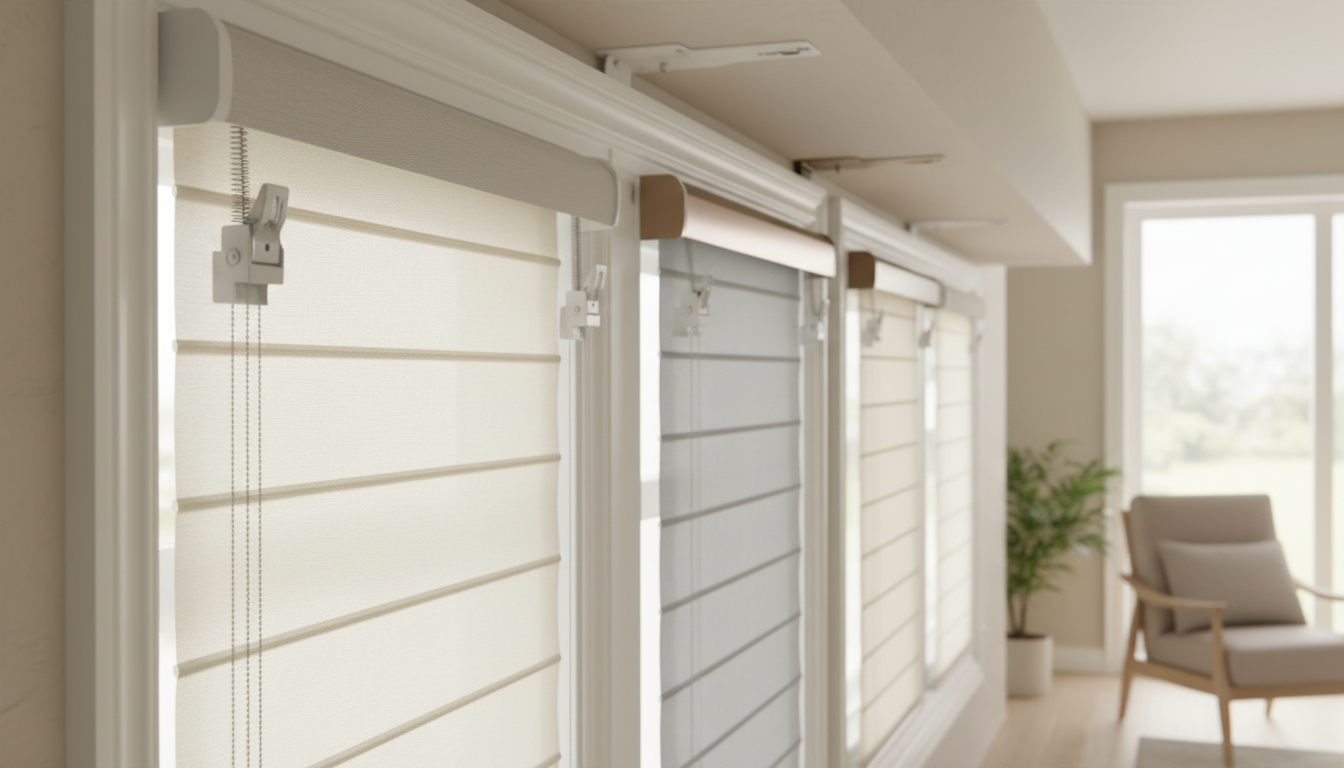
Before you start taking down your shades, it helps to know what you're working with. Shangri-La shades—also called sheer shades or silhouette shades—combine soft fabric vanes between layers of sheer material. They're mounted on a headrail that clips into brackets attached to your window frame or wall.
Most Shangri-La shades use one of three mounting systems: standard clip brackets, cassette headrail systems, or spring-loaded brackets. The bracket style affects how you'll remove them, so take a quick look at where your shades connect to the wall. You'll usually find 2-4 brackets depending on the shade width. If you're planning to upgrade later, check out our Shangri-La sheer shades collection for modern options, or browse our roller shades and zebra shades if you want a different style.
Tools You'll Need
Grab these items before you start:
- Flathead screwdriver (your main tool for releasing brackets)
- Phillips head screwdriver (for removing mounting screws)
- Step stool or ladder (if your windows are high)
- Soft cloth or towel (to protect the shade fabric)
- Helper (optional but useful for larger shades)
Most removal jobs only need a flathead screwdriver. The other tools are backup in case your brackets are secured differently or you want to remove the mounting hardware completely.
Step-by-Step Removal Process
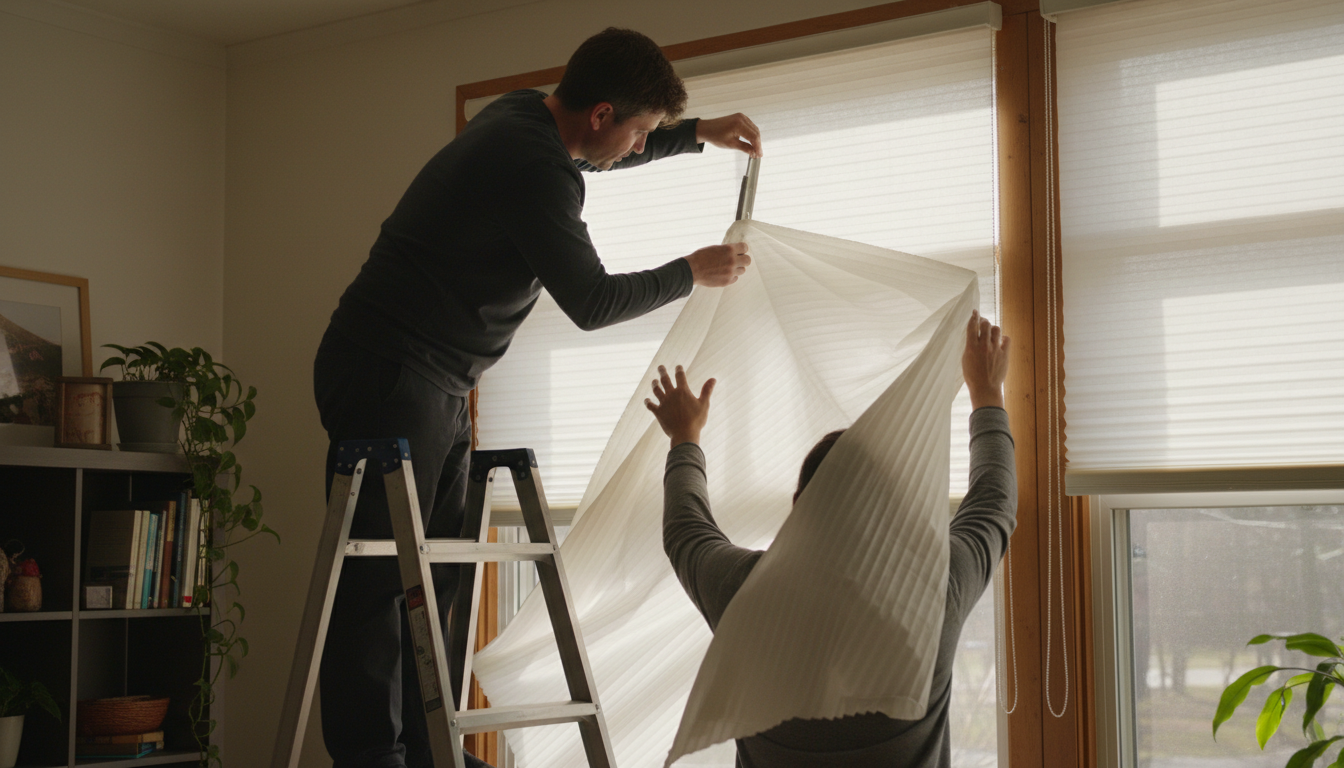
Step 1: Prepare the Shade Raise your Shangri-La shade completely to the top position. This gets the fabric out of the way and makes the brackets easier to access. If you have motorized shades, use your remote to bring them all the way up. For corded versions, just pull the control cord until the shade stops.
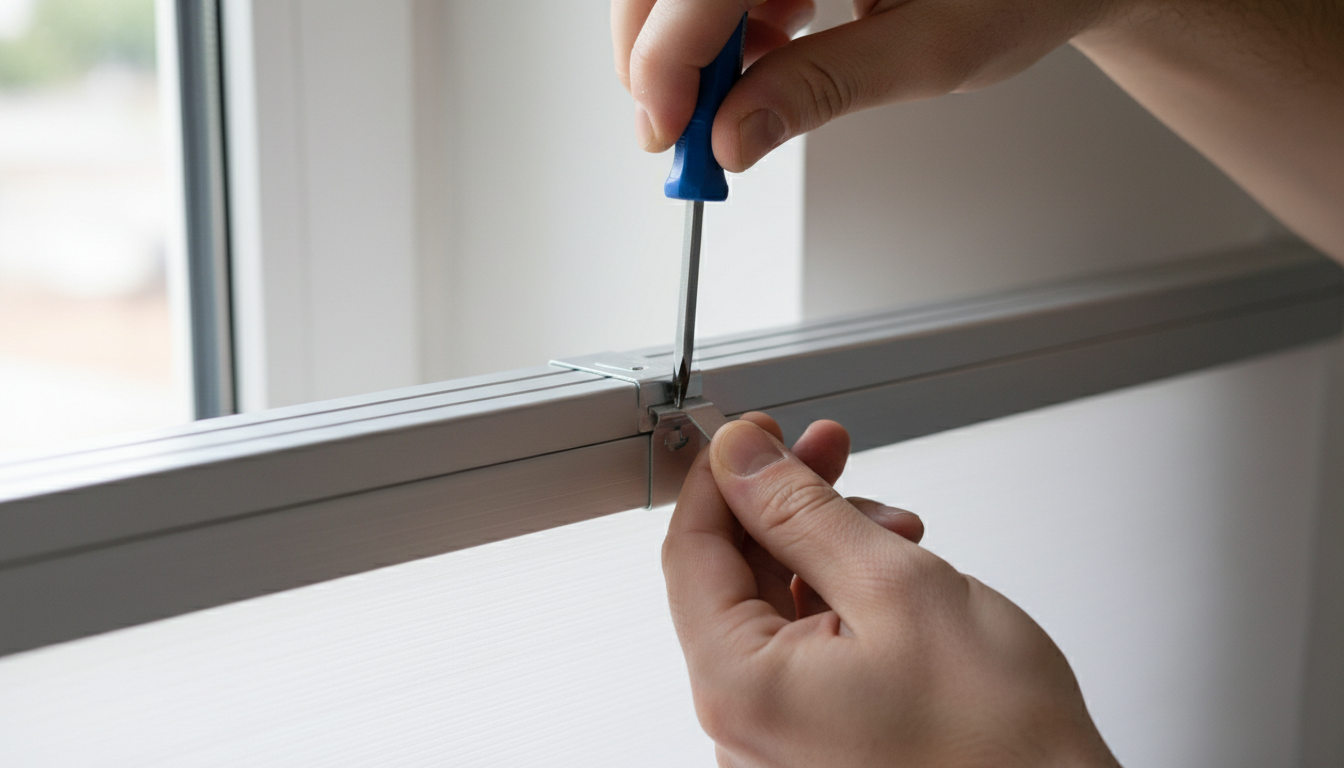
Step 2: Locate the Bracket Release Look at the back of the headrail where it meets each bracket. Most brackets have a small tab or lever—usually plastic—that holds the headrail in place. You might need to shine a light back there to see it clearly.
Step 3: Release the Headrail Insert your flathead screwdriver between the bracket and the headrail at the back. Gently twist or push the screwdriver to release the tab. You should feel it give slightly. The headrail will disengage from that bracket.
Step 4: Work Through All Brackets Move to the next bracket and repeat. Always work from one end to the other. If you have someone helping, have them support the shade while you release the final bracket—otherwise it might drop unexpectedly.
Step 5: Remove the Shade Once all brackets are released, gently pull the shade forward and away from the window. The headrail should slide right out. Set it somewhere safe where it won't get damaged.
Common Mounting Types and Tips
Standard Clip Brackets These are the most common. They have a visible plastic tab at the back that you press or pry with a screwdriver. The headrail snaps in and out pretty easily once you disengage the tab.
Cassette Headrail Systems Some Shangri-La shades have a decorative box (cassette) covering the headrail. Look for a lever on top of each bracket. Insert your screwdriver at the top edge and gently lift the lever while pulling the cassette away from the bracket.
Hidden Brackets A few models use concealed brackets with no visible tabs. These usually release by pulling the shade straight down first, then angling it forward. Check your manufacturer's instructions if this applies to you.
Removing the Mounting Brackets
If you're taking down the brackets too—maybe you're replacing your shades with cellular shades or woven wood shades—simply unscrew them from the window frame or wall. Remove the bottom screw first, then the top one. This prevents the bracket from rotating and scratching your paint or trim.
If there are small screw holes left behind, fill them with spackle or wood putty and smooth the surface with a putty knife. Let it dry completely before painting.
Troubleshooting Common Issues
Stuck Brackets Sometimes brackets don't release easily, especially if they've been installed for years. Don't force it—you might crack the plastic. Instead, spray a tiny bit of WD-40 on the tab mechanism, wait 30 seconds, then try again.
Can't Find the Release Tab If your bracket looks completely smooth, it might have a front-release system. Try gently pulling the shade forward while pressing different spots on the bracket face.
Shade Won't Come Out Double-check that you've released all brackets. It's easy to miss one, especially on wider shades with 3-4 brackets. Also verify nothing else is holding it—some installations include small safety clips or extension brackets.
Damaged Brackets If a bracket tab breaks during removal, you can still get the shade down. Carefully unscrew that specific bracket from the wall while supporting the shade. You can order replacement brackets if you plan to reinstall the shades later.
When to Call a Professional
Most people can remove Shangri-La shades themselves, but there are times when professional help makes sense. If your shades are installed 10+ feet high, you're not comfortable on a ladder, or the brackets seem unusually complex, don't risk it. Also, motorized shades with hardwired electrical connections should be handled by someone familiar with home wiring.
If you're replacing your shades entirely, consider getting help with both removal and installation. Our AOSKY collection offers free shipping and comes with detailed installation guides. You can also check out our Roman shade pattern guide for design inspiration.
Conclusion
Removing Shangri-La shades is straightforward once you understand your bracket system. The key steps are raising the shade completely, locating the release tabs, using a flathead screwdriver to disengage each bracket, and carefully removing the headrail. Take your time, work methodically through each bracket, and don't force anything.
Whether you're taking them down for cleaning, moving, or upgrading to new window treatments, this process typically takes 10-15 minutes per shade. Store removed shades in a safe place if you plan to reinstall them, and fill any screw holes if you're making permanent changes to your windows.
FAQs
Can I remove Shangri-La shades without damaging them? Yes, absolutely. As long as you release the bracket tabs properly and support the shade while removing the last bracket, the shades won't get damaged. The trick is not forcing anything—if a bracket won't release, reposition your screwdriver or check for a different release mechanism rather than prying hard.
Do I need special tools to remove Shangri-La shades? Not really. A basic flathead screwdriver handles most removal jobs. You might want a Phillips head screwdriver if you're also removing the mounting brackets from the wall, and a step stool for higher windows. That's it—no special equipment required.
How do I remove Shangri-La shades with a cassette headrail? Cassette systems have a lever on top of each bracket. Use your screwdriver to gently lift the lever while pulling the entire cassette forward and away from the bracket. Work through all brackets the same way, moving from one side to the other.
What if my Shangri-La shade brackets don't have visible tabs? Some brackets use a different release system. Try gently pulling the shade down and then angling it forward—some designs disengage this way. You can also check the manufacturer's website or installation manual for model-specific instructions. If you're still stuck, look closely with a flashlight for hidden release points on the bracket sides.
Can I reuse the brackets after removing Shangri-La shades? Definitely, as long as the brackets aren't damaged during removal. Keep the screws with the brackets, and they'll be ready for reinstallation. Just make sure the plastic tabs aren't cracked or broken. If you're switching to a different shade style, you'll likely need new brackets designed for that specific product.
Share