

Home
/
Buyer Guide for Shades & Blinds
/
How to Make Roman Shades: DIY Guide for Custom Window Treatments

How to Make Roman Shades: DIY Guide for Custom Window Treatments
Making your own roman shades is easier than you might think. We've seen DIYers save hundreds of dollars by creating custom window treatments at home—and the results look just as good as store-bought options. Whether you're working with a small bathroom window or a wide living room frame, this guide walks you through the process from start to finish.
Why Make Your Own Roman Shades?
Custom roman shades from retailers can easily run $200 or more per window. But when you make them yourself, you're looking at costs around $50-$100 depending on your fabric choice. Plus, you get complete control over the design. Pick any fabric that speaks to you, adjust the fold spacing to match your style, and create something that actually fits your window perfectly.
Another bonus? You'll avoid the limited sizing options that come with ready-made shades. If you've got an oddly sized window or just want something that looks uniquely yours, DIY is the way to go. And if you're someone who likes cordless window treatments for safety reasons, you can build that right into your design.
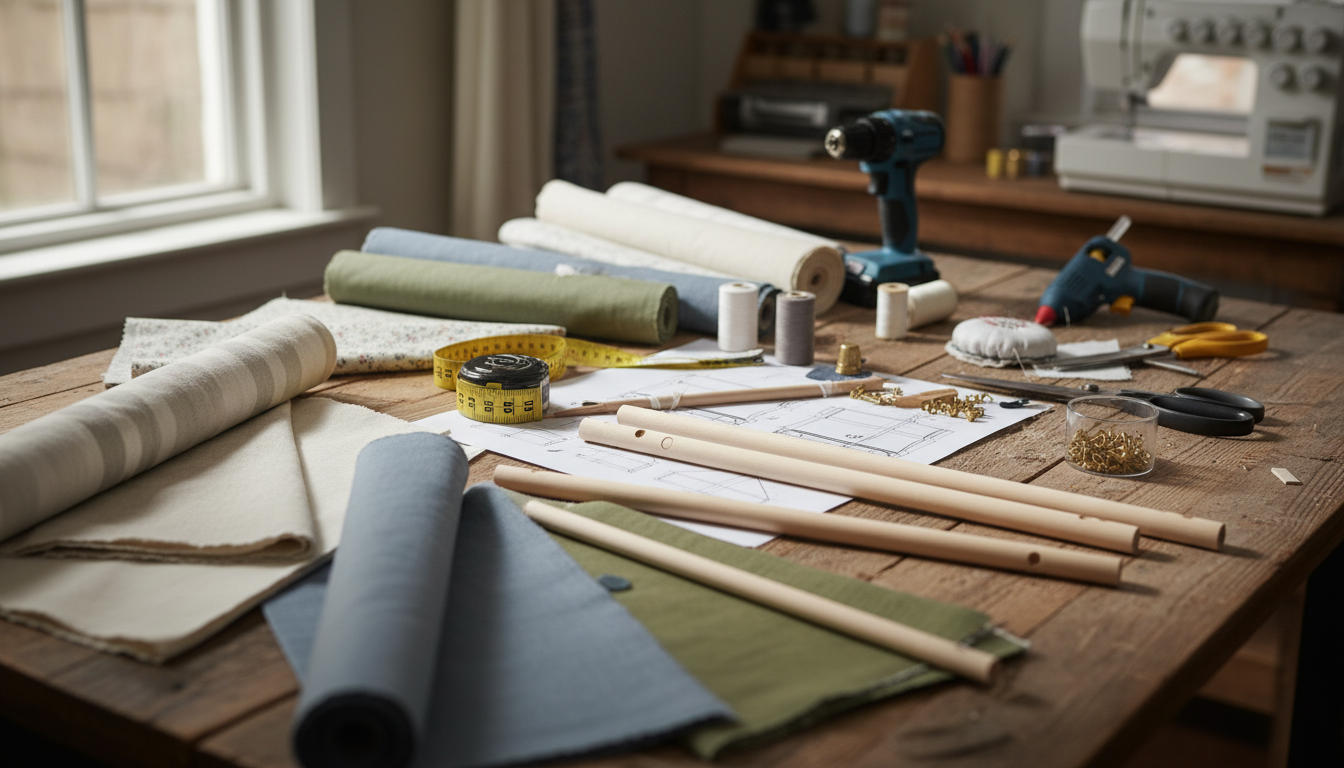
Materials You'll Need
Before you start cutting fabric, gather everything you'll need. Here's what we recommend:
Fabric & Lining:
- Decorator fabric (3 inches wider and 5 inches longer than your window measurements)
- Drapery lining fabric (1 inch narrower than finished width, same length)
Hardware & Structure:
- 1x2 inch wood board (cut to finished shade width)
- Wooden dowels (3/8 inch diameter, spaced 8-12 inches apart)
- Plastic shade rings
- Nylon cord or blind cord
- Screw eyes
- Mounting screws
- Staple gun and staples
Tools:
- Sewing machine
- Iron
- Measuring tape
- Scissors
- Drill (optional but helpful)
You can find dowels and mounting boards at any hardware store—many will even cut them to size for you. The rings, cord, and other specialty items are available at fabric stores or online. Check out our roman shade collection if you want to see professional options for inspiration before you start.
Measuring Your Window
This step matters more than you'd think. Measure twice (or three times), cut once.
Measure your window's width and height from frame to frame. Decide whether you want an inside mount (shade sits inside the window frame) or outside mount (shade covers the frame). For inside mounts, measure the exact window opening. For outside mounts, add 1-3 inches on each side.
Write down your finished width and finished height. Your decorator fabric should be cut 3 inches wider than finished width and 5 inches longer than finished height. The lining fabric goes 1 inch narrower than finished width but the same length as your decorator fabric.
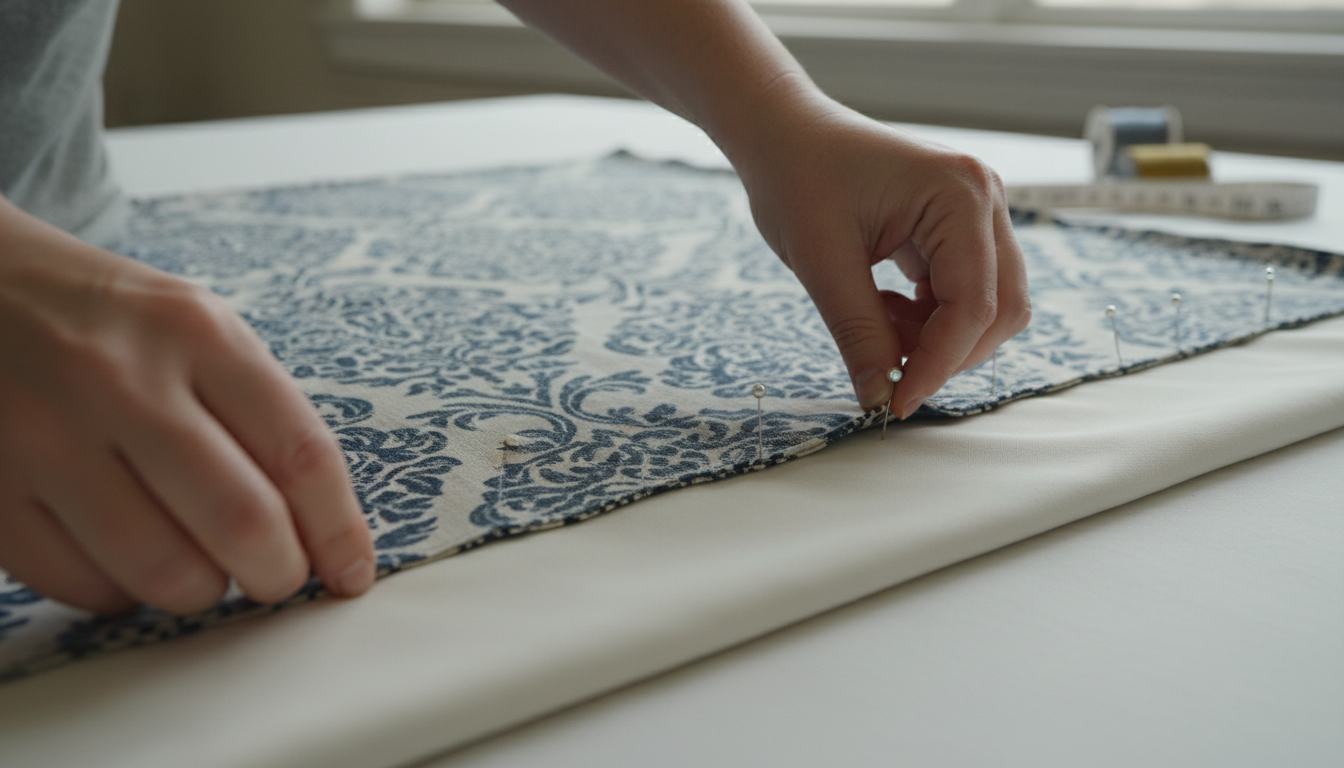
Preparing the Fabric
Start by washing and ironing both fabrics. You don't want wrinkles showing through your finished shade, and pre-washing prevents shrinkage later.
Cut your fabric to size based on the measurements above. Lay the decorator fabric right side down on a flat surface. Place the lining fabric on top, right side up, centered so there's about an inch of decorator fabric visible on each side.
Pin the two fabrics together along the sides and bottom, then sew with a 1/2 inch seam allowance. Leave the top edge open—you'll attach that to the mounting board later. Turn the shade right side out and press the seams flat.
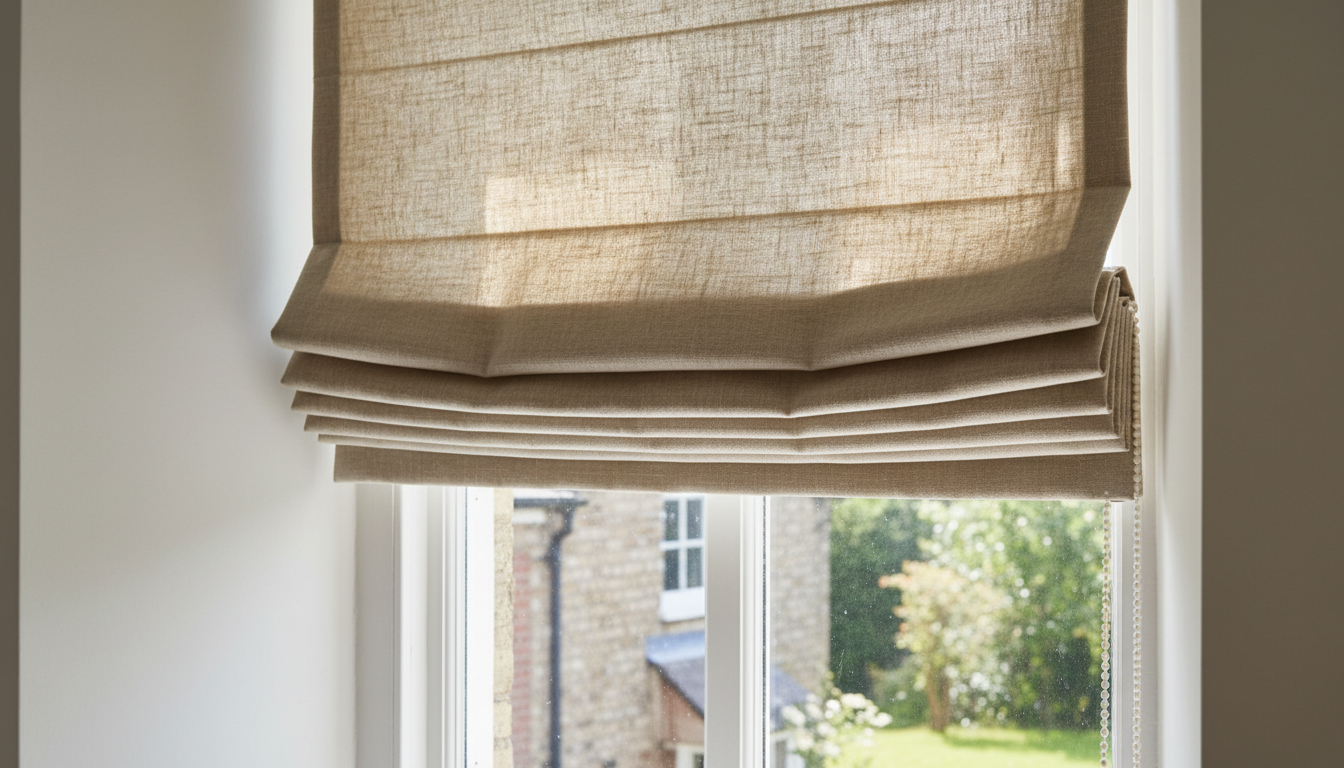
Creating Dowel Pockets
Dowel spacing affects how your shade folds. Most DIYers space dowels 8-10 inches apart, which creates pleats about 4-5 inches deep when raised.
Mark where each dowel will go on the lining side. Cut strips of lining fabric about 2 inches wide and slightly longer than your shade width. Fold these strips in half lengthwise, press, and sew them to create pockets. Pin each pocket along your marked lines on the back of the shade, then sew them in place using your sewing machine.
Slide the dowels (cut 1 inch shorter than your finished width) into each pocket. Hand-sew the ends closed so the dowels stay put.
Attaching the Rings
Rings guide the lift cord, so placement matters. Hand-sew rings to the back of the shade at the end of each dowel—one about 2-3 inches from each edge, and one in the center. If your shade is wider than 30 inches, add a fourth ring for better support.
Space the rings vertically every 8-10 inches up the length of the shade. Make sure they line up in straight columns or your shade won't raise evenly. Use strong thread and sew through just the lining fabric so stitches don't show on the front.
Mounting and Cording
Cut your 1x2 board to match the finished shade width. Wrap the top edge of your shade around this board and staple it securely in place. Pull the fabric tight as you staple to avoid puckering.
Install screw eyes on the underside of the board, positioned directly above each column of rings. Pre-drill the holes if you can—it makes installation easier.
Now for the cord. Cut pieces long enough to run from the bottom of the shade, up through all the rings, across the top through the screw eyes, and down the side with extra length for pulling. Tie each cord to the bottom ring in its column, then thread it up through the rings and screw eyes. All cords should exit on the same side where you'll pull to raise the shade.
Mount your board to the window frame using screws. Adjust the cord tension so all cords pull evenly, tie them together at the bottom with a cord pull, and add a cleat to the wall for wrapping the cord when the shade is raised.
Conclusion
Making roman shades takes some patience, but the results are worth it. You'll end up with custom window treatments that cost a fraction of retail prices and look exactly how you want them. The sewing is mostly straight lines, the hardware is simple, and once you've made one, the second goes much faster. Browse our home page for more window treatment ideas and inspiration for your next project.
FAQs
Can I make roman shades without a sewing machine?
Yes, though it takes longer. You can hand-sew the seams and use fusible hem tape for the straight edges. Some DIYers use fabric glue for attaching pockets, though sewing creates a more durable result. The ring attachment always requires hand sewing anyway.
How wide can a roman shade be before it needs extra support?
Most shades work well up to 48 inches wide. Beyond that, the fabric may sag or droop in the middle. For wider windows, consider making two narrower shades and mounting them side by side, or add extra vertical rows of rings and cords for support.
What type of fabric works best for roman shades?
Medium-weight fabrics like cotton, linen, or canvas work great. Avoid anything too heavy (hard to fold) or too sheer (won't block light well). If you want light blocking, use a blackout lining instead of standard drapery lining.
How do I clean DIY roman shades?
Cleaning is tricky. You'll need to remove the shade from the mounting board, take out all dowels and cords, then either hand wash or dry clean depending on your fabric. Some people attach shades with velcro instead of staples to make removal easier, though you'll still need to restring after washing.
Can I make cordless roman shades for safety?
Yes. You can use strong magnets sewn into the folds to create a cordless lift system, though this works better on narrower shades (under 35 inches). Another option is purchasing a cordless blind mechanism and attaching your fabric to it.
Share
